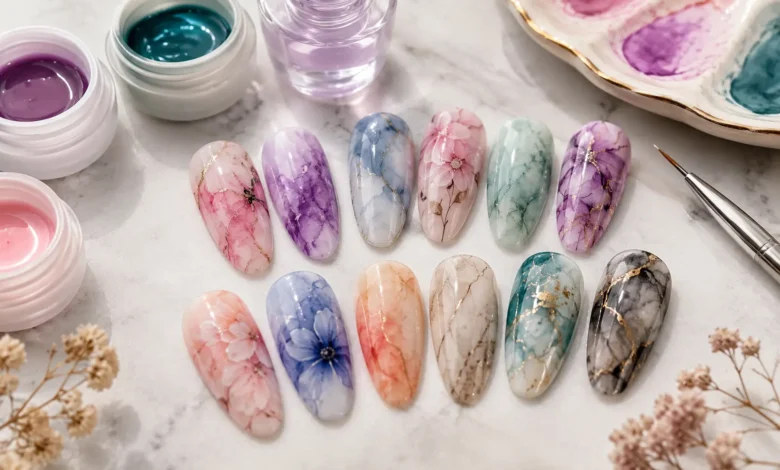
Nail art has always rewarded patience and a steady hand, but blooming gel has quietly changed that rule. Instead of painting every petal or swirl by hand, this clear gel does the hard part for you — spreading colour across the nail in soft, unpredictable patterns that look like tiny watercolour paintings. That is exactly why blooming gel nail art has become one of the most searched trends among both professional nail artists and at-home manicure enthusiasts.
If you have ever wondered what is blooming gel, how it actually works, or which blooming gel designs are worth trying first, this guide covers everything from the science behind the bloom to 12 blooming gel designs that feel like wearable art. Whether you are picking up a bottle for the first time or looking to level up your technique, you will find practical, beginner-friendly guidance here.
What Is Blooming Gel?
Blooming gel is a thin, translucent gel polish that is applied over a cured base colour and left uncured. When coloured gel polish is dropped or dotted onto this uncured layer, it spreads, diffuses, and blends on its own, creating a soft, organic pattern similar to ink dropped into water. This spreading is what gives the product its name — the colours appear to “bloom” outward across the nail.
Unlike regular gel polish nail art, where every line and shape has to be drawn by hand, blooming gel nail polish relies on a chemical reaction between the uncured gel and the pigment in the colour polish. The artist controls the starting point, the number of colours, and the tools used, but the actual spreading pattern is never fully predictable — which is part of what makes each design so unique.
How Does Blooming Gel Work? The Science Behind the Bloom
The blooming effect happens because of a difference in viscosity and surface tension between the clear blooming gel and the coloured gel polish placed on top of it. Blooming gel is formulated to stay uncured and fluid for longer than standard gel polish, which gives the pigment room to move, diffuse, and blend into soft gradients before it is locked in place under a UV or LED lamp.
This is also why timing matters so much in the blooming gel technique. As long as the base layer remains uncured, the colours will keep spreading and merging. The moment the nail goes under the lamp, the movement stops instantly, freezing the pattern exactly as it looks at that second. This is why many nail artists recommend curing one nail at a time rather than doing all ten fingers before curing — it gives you control over exactly how much the design spreads before it sets permanently.
Why Every Blooming Gel Design Looks Different
One of the most appealing aspects of blooming gel nail art is that no two nails ever come out identical, even when using the exact same colours and tools. Small variations in the amount of gel used, the pressure of the brush or dotting tool, the temperature of the room, and even how long the design is left uncured before curing all influence how the colours spread.
For nail artists, this unpredictability is a feature rather than a flaw. It means every set of blooming gel nails feels custom-made, and clients often describe the results as looking more like abstract art than a typical manicure. For beginners, it also means there is very little pressure to get every stroke perfect — the gel is doing a large part of the creative work for you.
Blooming Gel vs Regular Gel Polish
| Feature | Blooming Gel | Regular Gel Polish |
|---|---|---|
| Texture | Thin, translucent, stays uncured longer | Thicker, opaque, cures normally |
| Purpose | Creates spreading, blended nail art effects | Provides solid, even colour coverage |
| Application | Applied uncured, colour added on top | Applied and cured in standard layers |
| Best for | Marble, floral, watercolour, abstract designs | Base colours, solid manicures |
| Skill level | Beginner-friendly, forgiving results | Requires precision for nail art details |
Understanding the difference between blooming gel and gel polish helps set the right expectations. Regular gel polish is designed for even, opaque coverage, while blooming gel is designed specifically to create movement and blending — the two work together rather than replacing one another.
Blooming Gel vs Alcohol Ink Nails
Alcohol ink nail art also creates flowing, marbled patterns, but the technique and result differ meaningfully from blooming gel. Alcohol ink is dropped directly onto an uncured top coat or gel base and reacts with alcohol droplets to create sharp, high-contrast veining, often used for stone or geode-style designs.
Blooming gel, by comparison, produces a softer, more watercolour-like diffusion because the pigment spreads through the gel itself rather than reacting with alcohol. If you want delicate florals, soft gradients, or gentle marbling, blooming gel is generally the easier and more forgiving choice. If you are after sharp, dramatic veining, alcohol ink nails may suit that specific look better.
Tools You Need for Blooming Gel Nail Art
You do not need an elaborate nail art brush collection to get started with blooming gel, but a few basic tools make a noticeable difference in the quality of your designs.
- Dotting tool — used to place small dots of colour for flowers and abstract dot patterns; double-ended dotting tools with multiple tip sizes offer the most versatility.
- Fine detail brush — ideal for pulling colour into petals, swirls, or fine lines within the bloom.
- Double liner brush — a two-pronged brush that allows you to pull two colours at once, useful for symmetrical petal shapes or vein-like details.
- Round brush — good for larger colour drops and broader marbled effects.
- UV or LED lamp — required to cure both the base colour and the finished blooming gel design once you are happy with the spread.
A basic blooming gel nail kit will usually include the clear gel itself along with one or two brushes, but investing in a small separate set of nail art brushes gives you far more control as your designs get more detailed.
How to Use Blooming Gel: Step-by-Step Guide
Step 1: Prep the nail. Push back cuticles, shape and buff the nail surface, and cleanse thoroughly before applying any product. Good prep is what makes any gel manicure last.
Step 2: Apply and cure your base colour. Apply your chosen base colour in one or two thin coats, curing fully under your lamp according to the product’s instructions.
Step 3: Apply a thin layer of blooming gel. Cover the nail with a thin, even layer of clear blooming gel nail polish. Do not cure this layer yet — this is the uncured surface the colours will spread across.
Step 4: Add your colours. While the blooming gel is still wet, use a dotting tool, fine brush, or liner brush to add small amounts of coloured gel polish. Watch as the colour begins to spread and diffuse on its own.
Step 5: Manipulate the design (optional). Use a fine brush or dotting tool to gently pull, swirl, or drag the colours into flowers, marbling, or abstract patterns while the gel is still uncured.
Step 6: Cure once satisfied. As soon as the design looks the way you want, cure the nail under a UV or LED lamp. Curing stops the spreading instantly, so it is best to work on one nail at a time rather than several fingers together.
Step 7: Seal with a top coat. Finish with a glossy or matte top coat to protect the design and give it a salon-level finish.
How to Fix Common Blooming Gel Mistakes
Even experienced nail artists run into a few recurring issues with blooming gel, but most are easy to correct once you know what causes them.
Design spread too far or turned muddy. This usually happens when too much colour is added at once, or when the nail sits uncured for too long. Apply smaller amounts of colour and cure sooner if this keeps happening.
Colours look clumpy instead of smooth. This is often caused by applying the blooming gel layer too thickly. A thin, even layer allows colours to diffuse properly, while a thick layer traps pigment in clumps.
Design didn’t spread at all. This can happen if the blooming gel was accidentally cured, even briefly, before the colour was added, or if the wrong type of colour product — such as a thick gel paint instead of gel polish — was used on top.
Colours mixed into mud instead of staying distinct. Adding too many colours in the same spot without enough space between them can cause everything to blend into a single muddy tone. Leave gaps between colour drops so each one has room to spread independently.
Best Blooming Gel Brands to Try
A handful of brands have become popular reference points for anyone shopping for blooming gel nail art supplies. Saviland blooming gel is widely available as an affordable, beginner-friendly clear gel, often sold in a small blooming gel nail kit that includes a nail art brush alongside the gel itself, and it is compatible with both UV and LED lamps. GelBottle blooming gel is another commonly referenced option among nail artists, frequently used in professional tutorials for marbled and floral blooming gel designs.
When comparing best blooming gel brands, it helps to look at three things: how long the product stays workable before curing, how well it plays with a range of gel polish colours, and how easy it is to control with basic tools. Reading recent reviews before buying is worthwhile, since formulas and packaging are updated fairly often across brands.
12 Blooming Gel Designs That Feel Like Wearable Art
1. Classic Blooming Flower
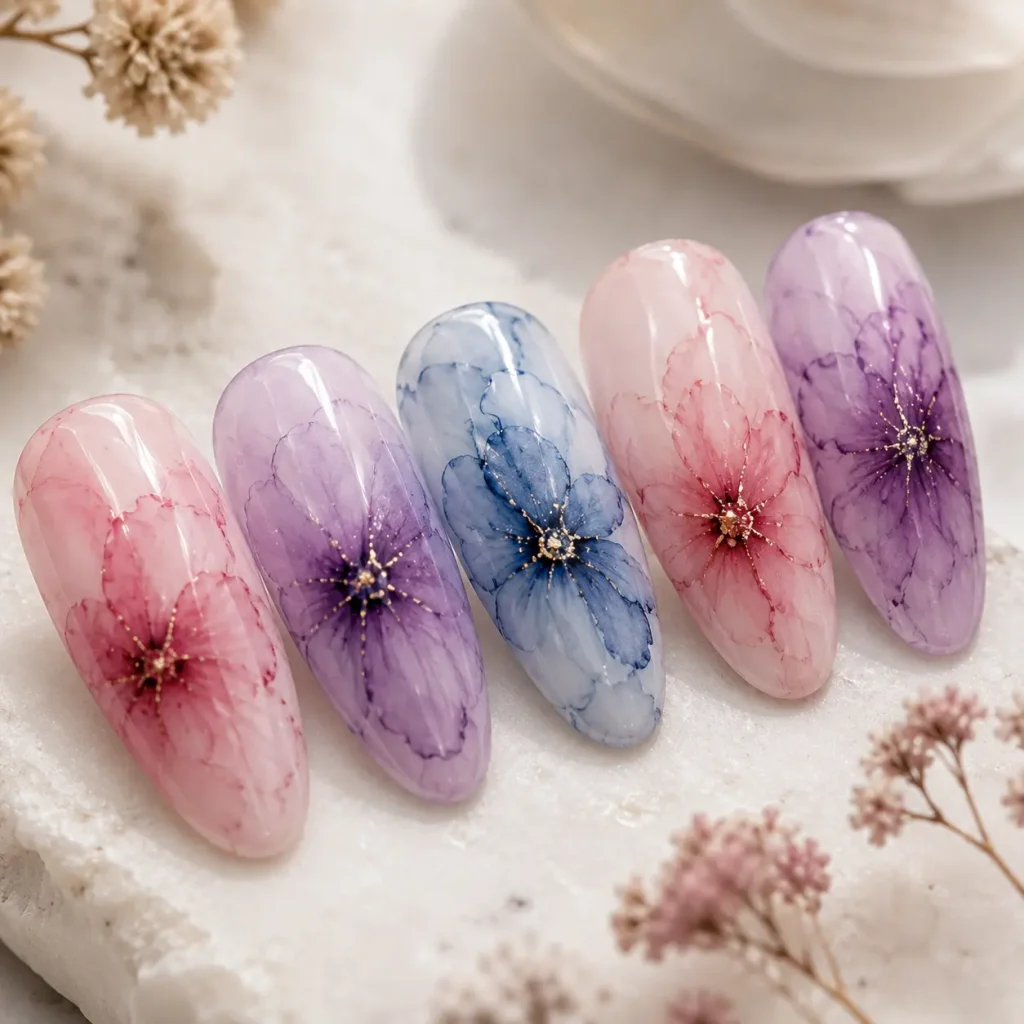
The blooming gel flower design is the technique’s signature look and the best starting point for beginners. Five or six dots of colour placed in a circle on uncured blooming gel will naturally spread into soft, rounded petals, with an optional contrasting dot in the centre. Leaving a little space between each dot allows the gel to create a smooth gradient between petals rather than a solid blob of colour.
2. Watercolour Wash Design
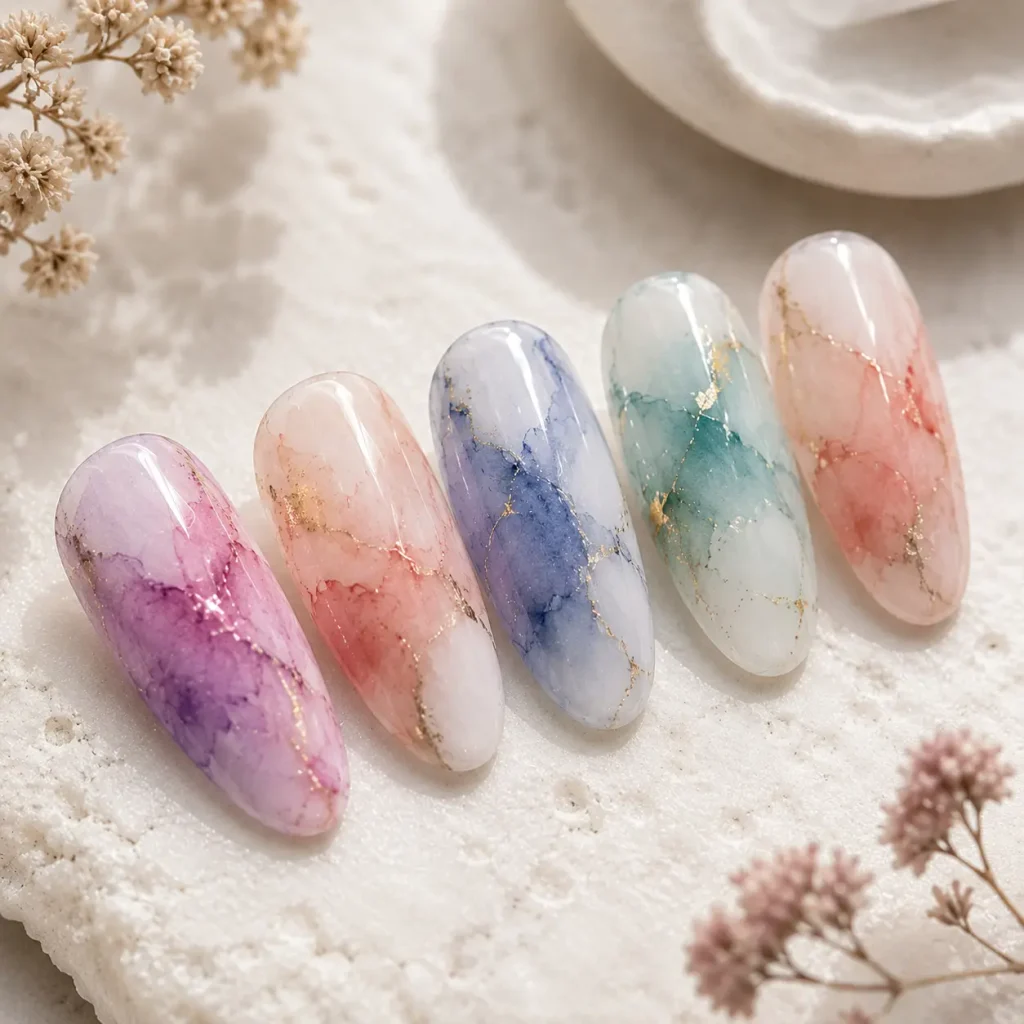
For a softer, more abstract look, a watercolour wash design uses two or three complementary colours dragged loosely across the nail with a round brush. Rather than shaping distinct flowers or lines, the goal is to let the colours blend into a gentle wash, similar to a watercolour painting on canvas. This design works particularly well with pastel shades for a dreamy, understated finish.
3. Marble Blooming Nails
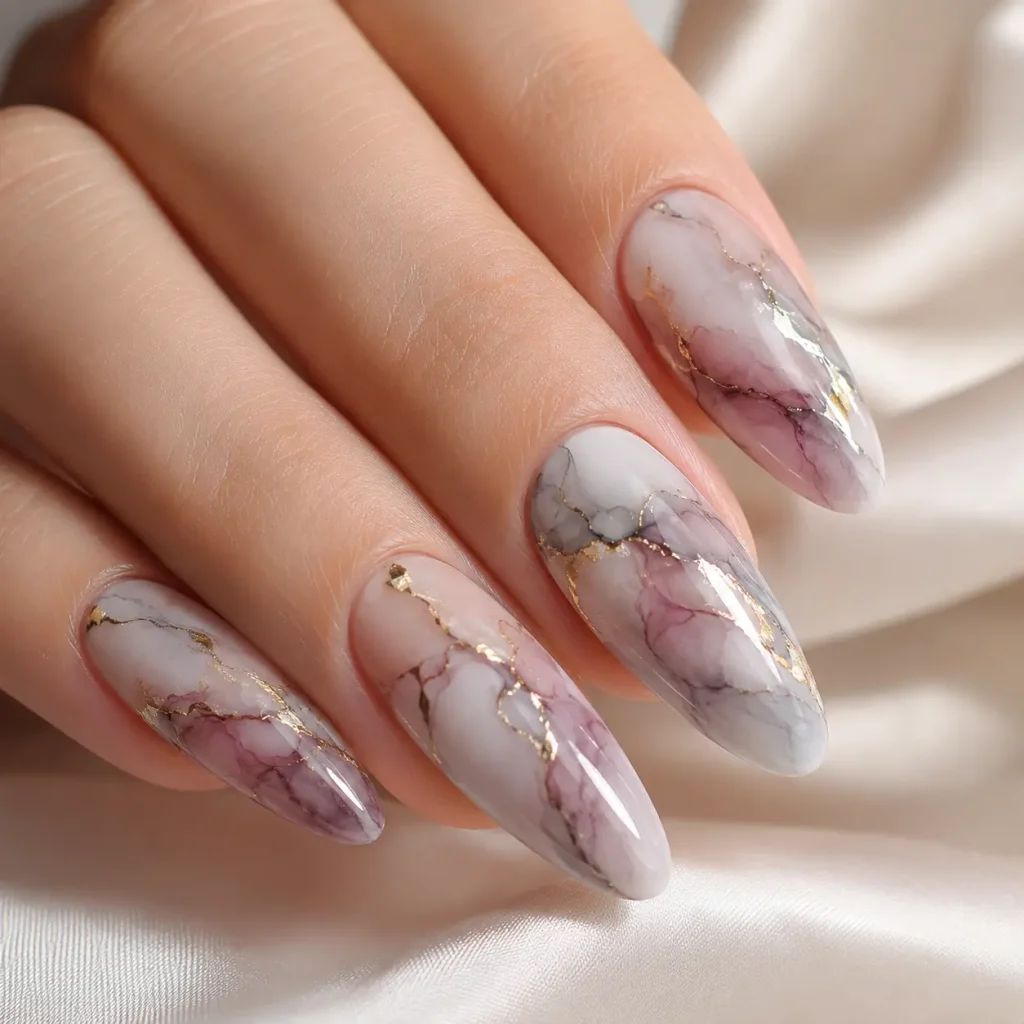
Marble blooming nails combine a base colour with one or two contrasting shades pulled into swirling veins using a fine detail brush. Unlike traditional marbling techniques that use water or alcohol ink, blooming gel allows the veining to stay soft-edged and naturally blended, which gives the finished nail a more organic, stone-like appearance.
4. Snake Skin Blooming Design
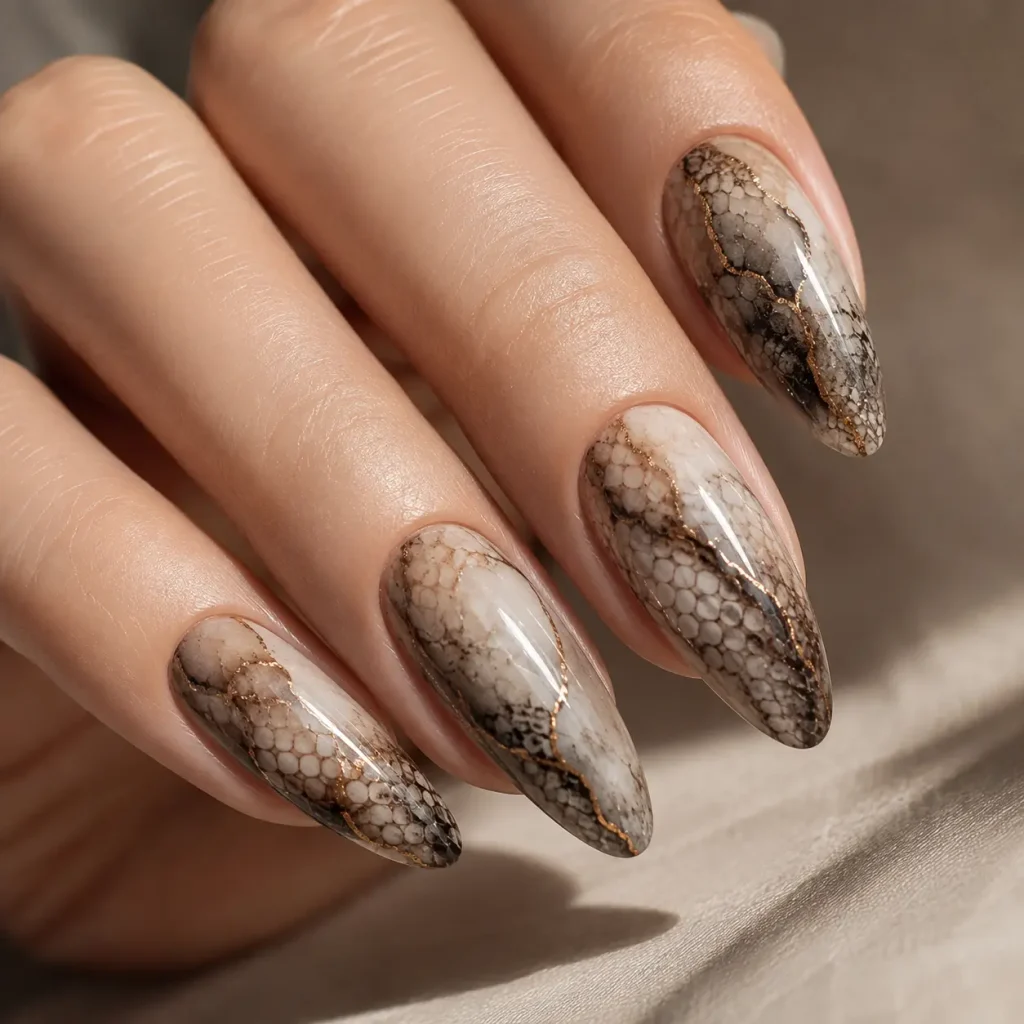
The blooming gel snake skin design creates a textured, scale-like pattern by dotting small clusters of two contrasting colours close together and allowing them to spread just enough to touch at the edges. A fine liner is then sometimes used to add subtle outlines once the design is cured, mimicking the layered look of snake skin without needing complex stencils.
5. Butterfly Wing Bloom
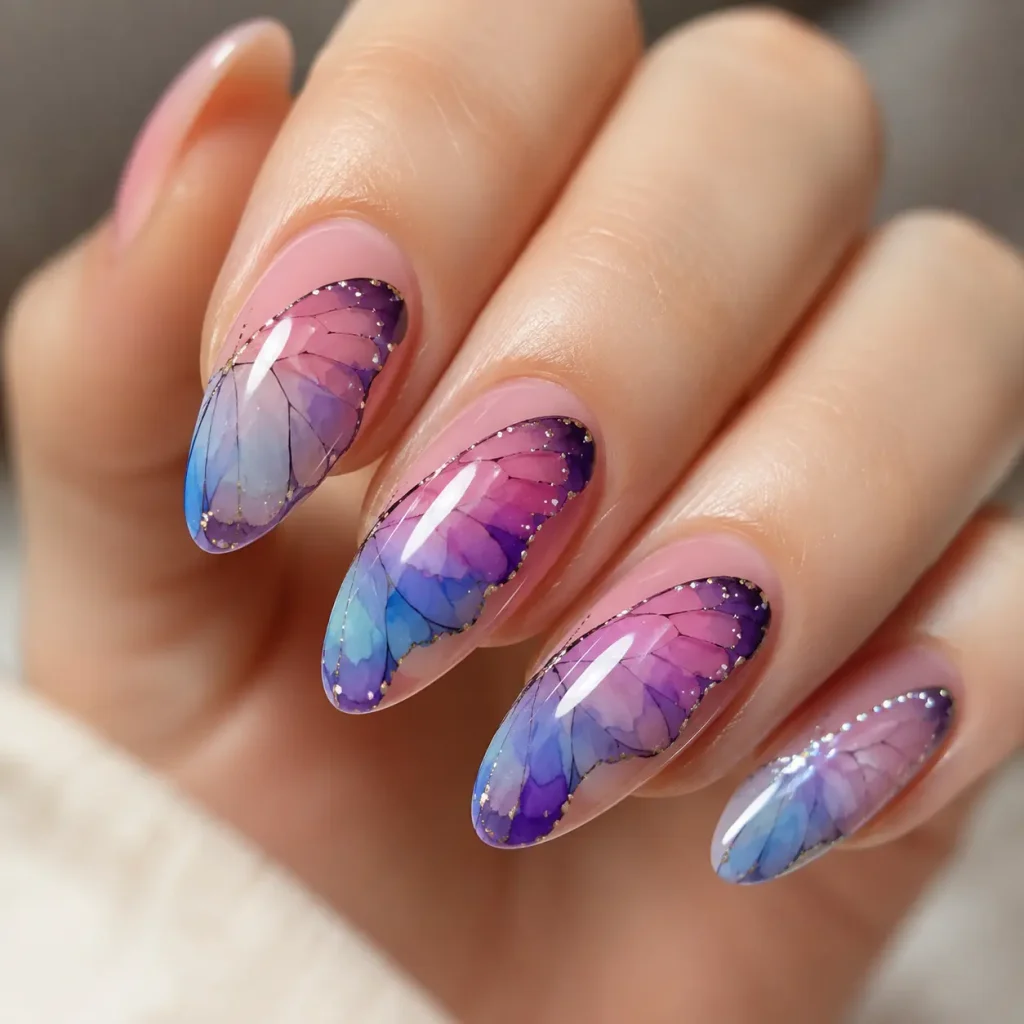
Blooming gel butterfly nails use symmetry to create a striking, statement design. A double liner brush is especially useful here, allowing two colours to be pulled outward from a central line at the same time to form mirrored wing shapes. Adding a metallic or shimmer accent along the wing edges gives the design extra dimension.
6. Abstract Ink-Blot Art
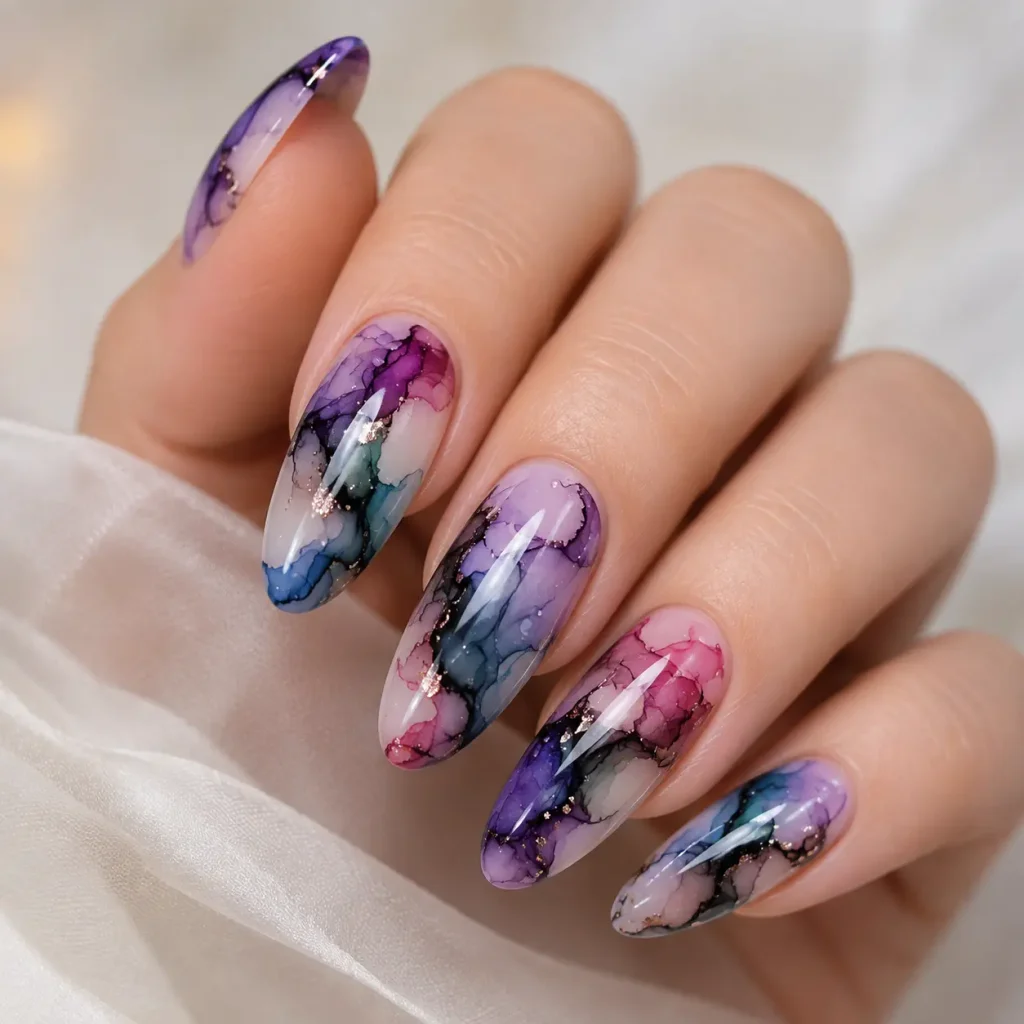
For anyone drawn to blooming gel abstract art, an ink-blot style design embraces the unpredictability of the technique fully. Random dots of two or three colours are dropped onto the nail and left to spread naturally with minimal manipulation, creating a one-of-a-kind pattern reminiscent of a Rorschach test. This is one of the easiest and quickest designs to execute since it requires almost no shaping.
7. Colorblock Bloom
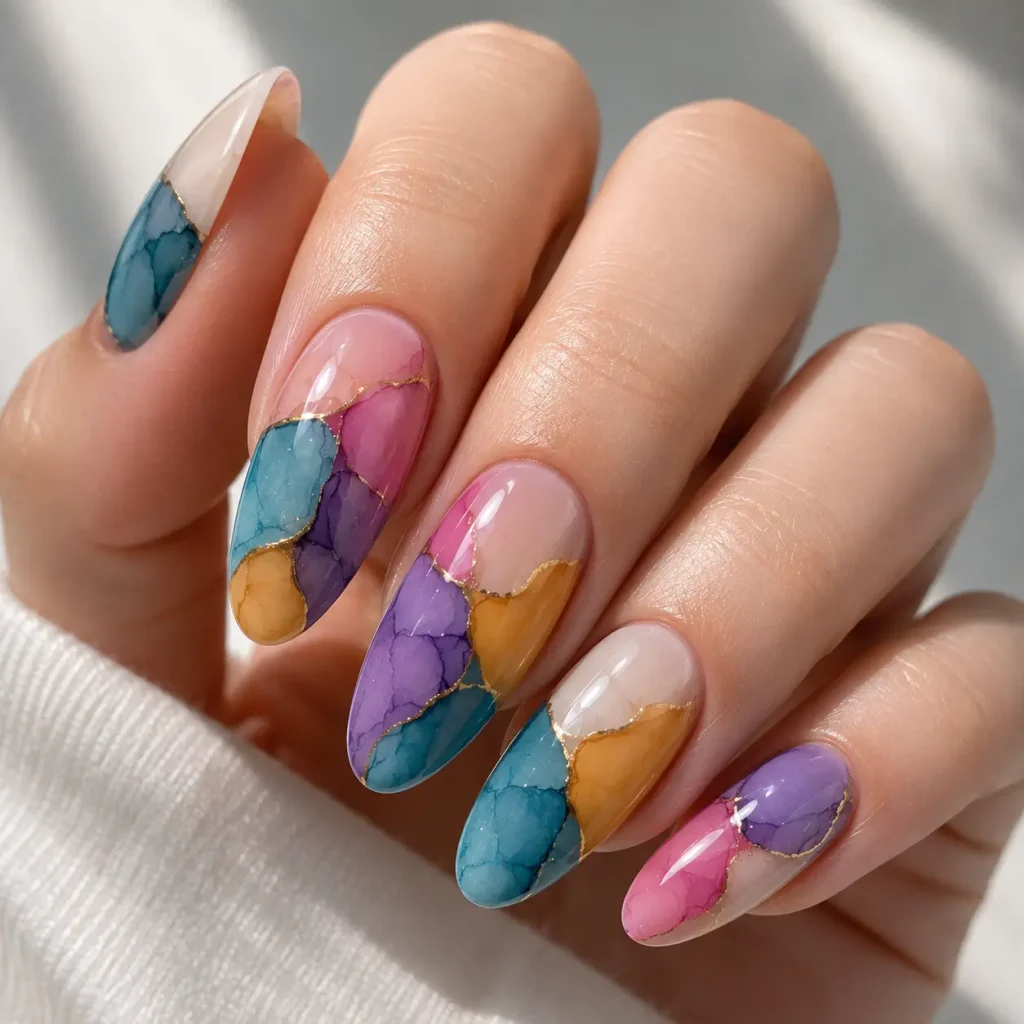
A blooming gel colorblock design divides the nail into distinct colour zones — often using a thin strip of tape as a guide — with blooming gel applied and coloured separately within each section. The contrast between crisp colour block edges and the soft, blended bloom inside each section creates a striking balance between structure and spontaneity.
8. Ombre Bloom
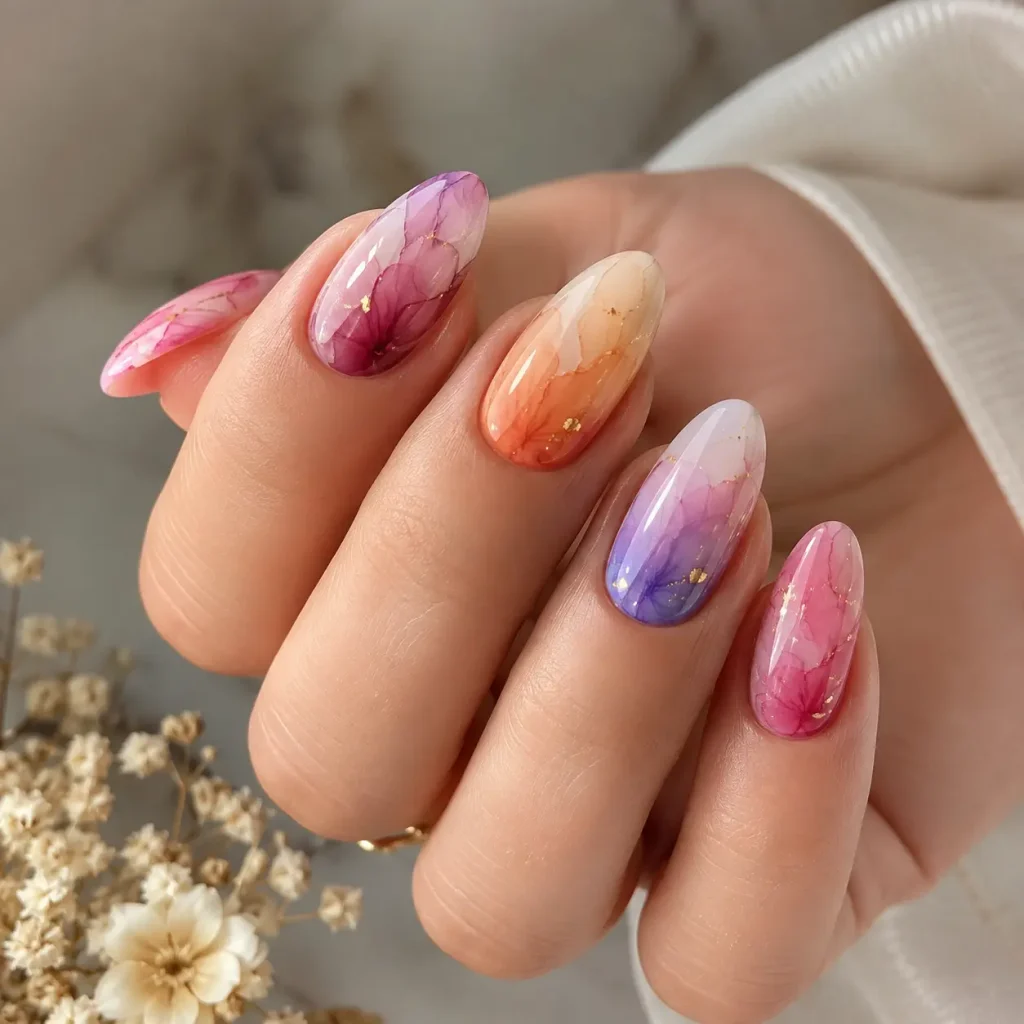
An ombre bloom design uses two or three shades of the same colour family, applied from the cuticle to the tip, and allowed to blend into one another using the blooming gel base. The result is a soft gradient effect that looks considerably more polished and salon-finished than a standard sponge-blended ombre manicure.
9. Tropical Sunset Bloom
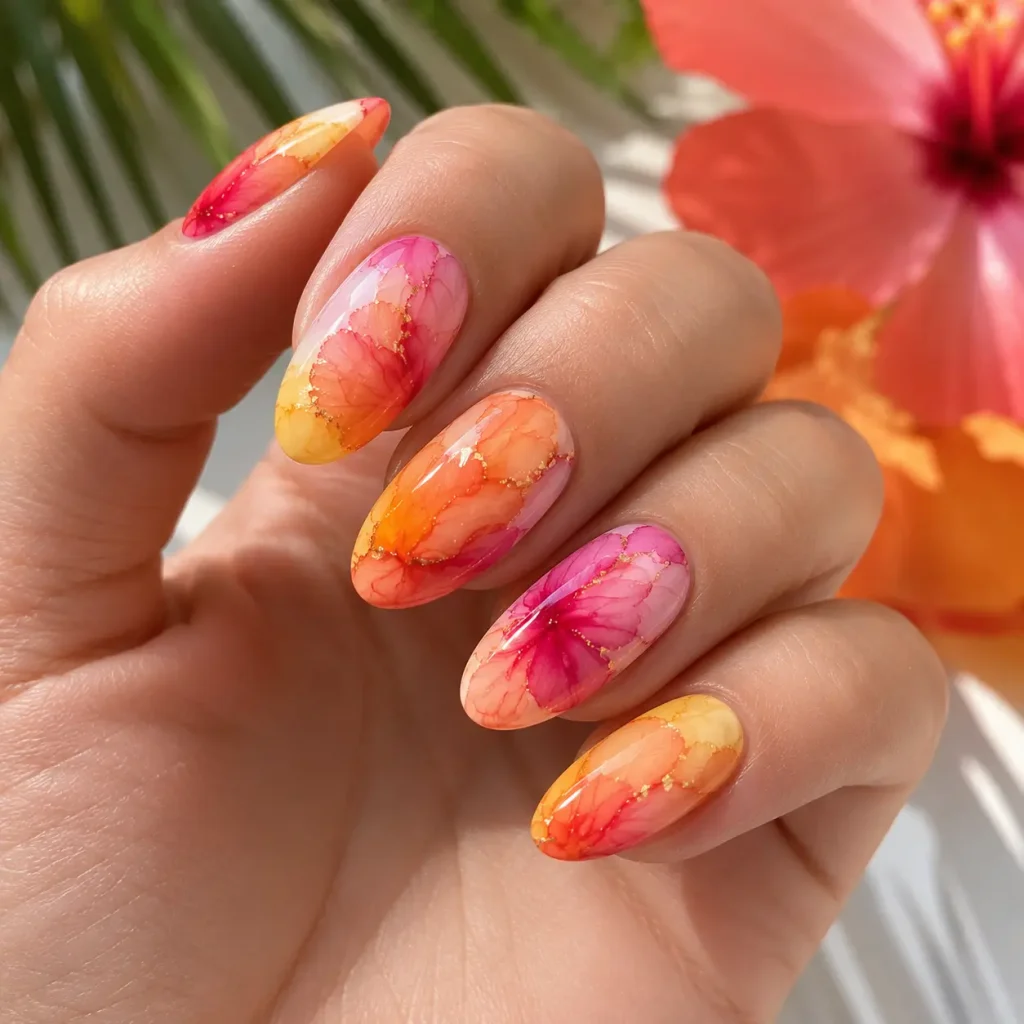
Inspired by warm-weather palettes, this design layers orange, pink, and yellow tones over blooming gel to mimic the colours of a sunset. It is a popular choice among summer blooming gel nails because the warm gradient photographs beautifully and pairs well with gold foil or shimmer accents along the tip.
10. Galaxy or Cosmic Bloom
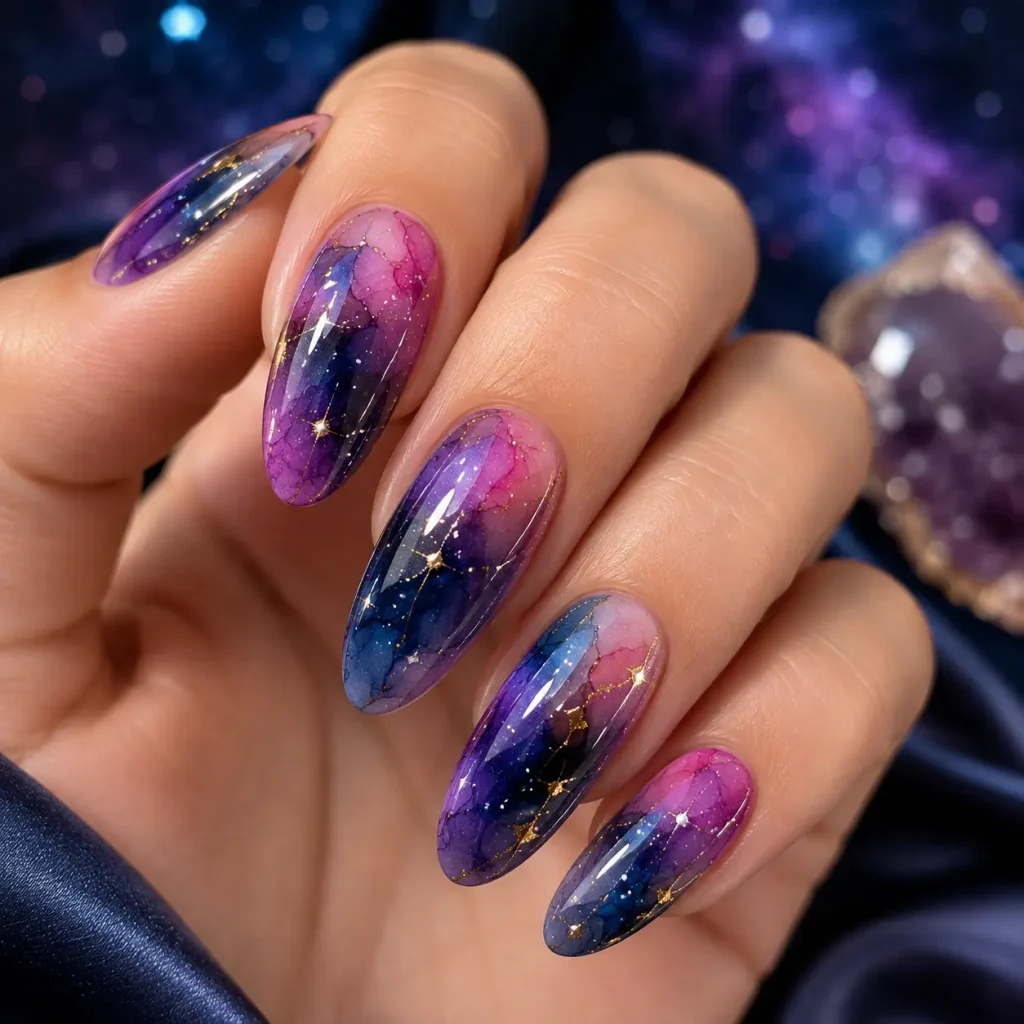
For a bolder, more dramatic look, a galaxy bloom combines deep blues, purples, and blacks with small white or silver dots added after curing to mimic stars. The blooming gel base allows the darker colours to merge into smoky, nebula-like clouds before the finer star details are added on top.
11. Floral Vine Bloom
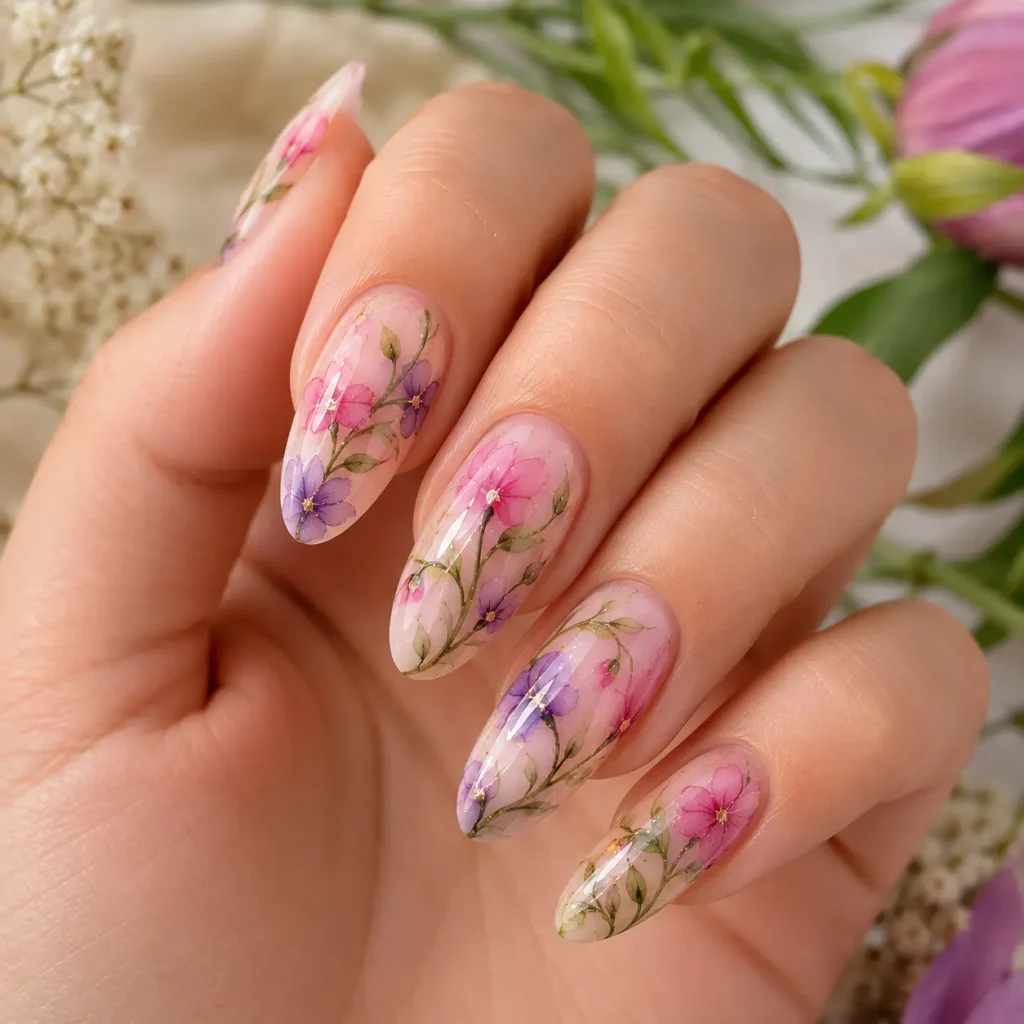
Rather than a single centred flower, this design uses a fine brush to draw a thin curved vine line across the nail, with small blooming gel flower clusters placed along its length. It creates a more delicate, trailing floral effect that works particularly well on longer nail shapes like almond or coffin.
12. Minimalist Single-Petal Bloom
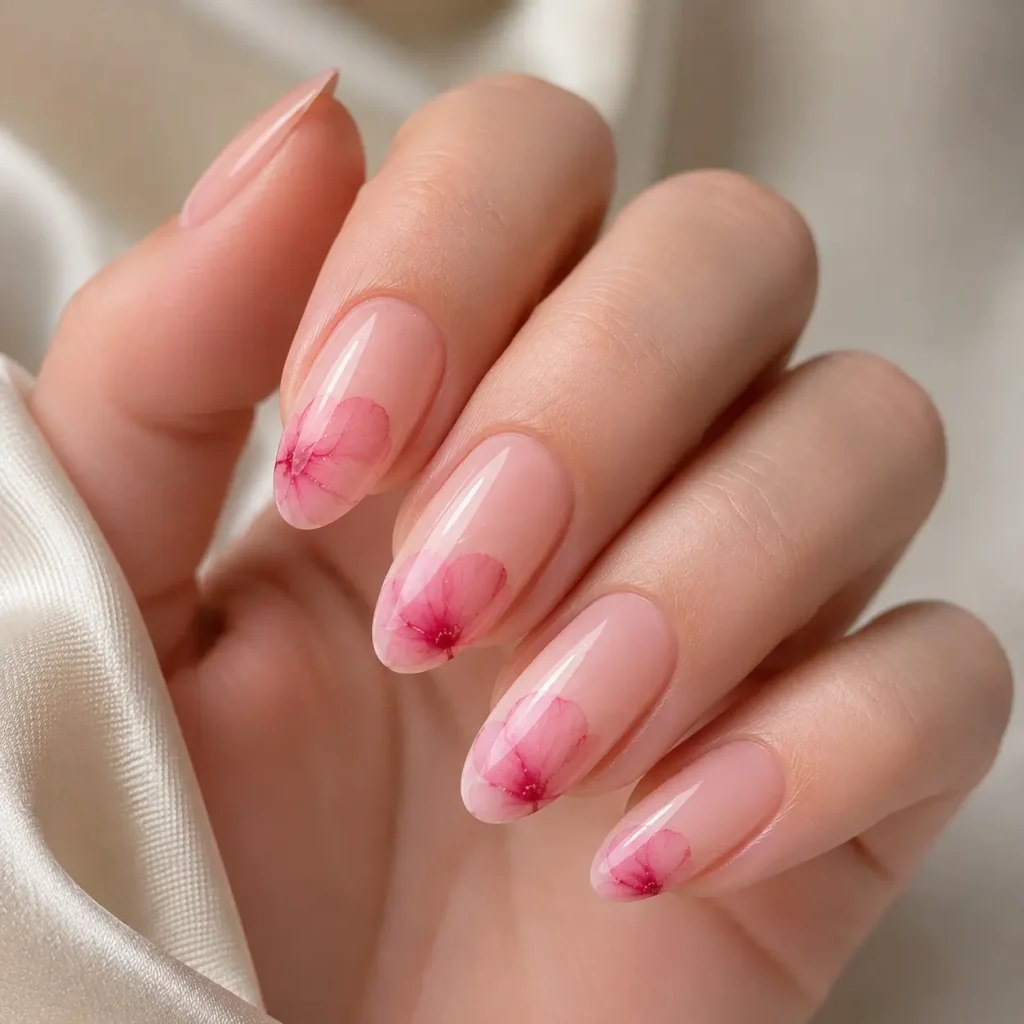
Not every blooming gel design needs to cover the entire nail. A single, softly blended petal or dot placed near the cuticle or side of an otherwise plain nail offers a minimalist, easy blooming gel design that is quick to execute and suits everyday wear, office settings, or anyone easing into the technique for the first time.
Blooming Gel for Beginners: Easy Designs to Start With
If you are trying blooming gel for the first time, start with designs that use only two colours and minimal manipulation. The classic blooming flower, the abstract ink-blot design, and the minimalist single-petal bloom are the most forgiving starting points, since they rely on the gel’s natural spreading rather than precise brush control.
Practising on a nail wheel or spare tips before working on your actual nails is also a smart way to get comfortable with timing — specifically, learning how long to leave the design uncured before the spread reaches the look you want.
A Brief History: How the Blooming Gel Trend Started
Blooming gel is not an entirely new invention — its underlying concept borrows from watercolour and ink-blooming techniques that nail artists experimented with for years using alternative bases before dedicated blooming gel formulas existed. As professional gel polish brands began releasing purpose-made blooming gel products, the technique became far more accessible, moving from a niche salon skill into a mainstream nail art trend that home manicure enthusiasts could recreate with basic tools. Social media played a significant role in this shift, with time-lapse videos of colours spreading in real time helping the technique go viral across nail art communities.
Frequently Asked Questions
Does blooming gel need a UV lamp?
Yes, blooming gel needs to be cured under a UV or LED lamp once the design looks the way you want it. The lamp is what stops the colours from spreading further and locks the pattern in place permanently.
Can beginners use blooming gel?
Yes, blooming gel is considered one of the more beginner-friendly nail art products because the gel does much of the design work automatically. Simple designs like the classic flower or an abstract ink-blot pattern require very little brush skill to look polished.
How long does blooming gel take to bloom?
The blooming effect usually begins within seconds of adding colour and can continue spreading for up to a minute or two if left uncured. The exact timing depends on the thickness of the blooming gel layer and the amount of colour used, which is why many artists recommend curing as soon as the desired look is achieved.
Can you mix colors with blooming gel?
Yes, multiple colours can be added to the same uncured layer of blooming gel, and they will often blend into one another where they meet. Leaving small gaps between colour drops helps keep individual colours more distinct rather than merging into a single blended tone.
Is blooming gel a gel polish or a top coat?
Blooming gel is neither a standard gel polish nor a top coat. It is a specialised, translucent base layer designed specifically to stay uncured long enough for coloured gel polish to spread across it, after which a separate top coat is usually applied to seal and finish the design.
Final Thoughts
Blooming gel designs prove that nail art does not need to be painstakingly hand-drawn to look like genuine wearable art. From the classic blooming flower to more advanced marbled and galaxy-inspired looks, the technique rewards a little patience and a willingness to let the gel do part of the creative work. With just a clear blooming gel, a few gel polish colours, and a basic dotting tool or fine brush, anyone — from complete beginners to seasoned nail artists — can create a manicure that feels genuinely one-of-a-kind every single time.
Also Read: How to Choose Comfortable Bridal Shoes for Your Big Day