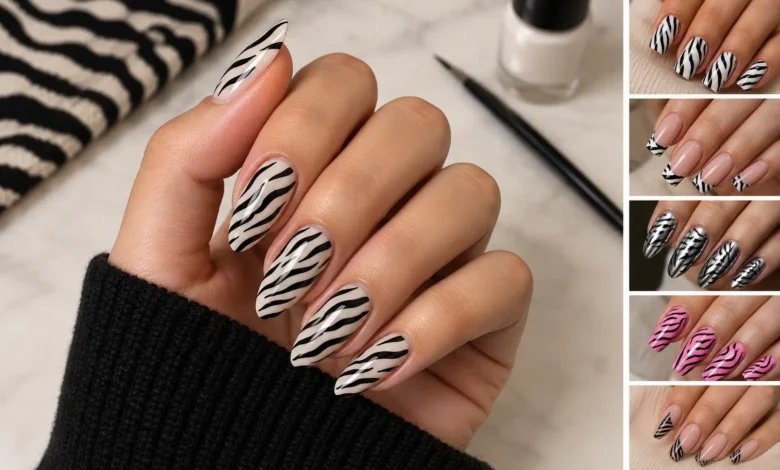
Zebra print nails are one of the easiest ways to make a manicure look bold. A few thin black stripes on a clean base can read as sharp, graphic and a little wild, and you can do them at home with one fine brush.
This guide covers five edgy zebra print nails ideas, from a short-nail classic to a chrome version for gel fans. You’ll also get step-by-step stripe tips, the best shapes and colors, and fixes for the mistakes that make zebra nails look messy.
How we put this together: we reviewed nail-art tutorials and trend coverage (checked in October 2026) and general nail-care practice. We haven’t tested specific products, so we don’t recommend brands. Difficulty ratings are our own estimates.
Quick Answer: How Do You Do Zebra Print Nails?
Start with a clean base color, then draw thin, curved black stripes with a fine striping brush. Vary the length and direction so the stripes look natural, leave space between them, and finish with a top coat.
- Apply a base coat.
- Paint a base color (white, nude, pink or clear).
- Draw tapered, slightly curved black stripes with a thin brush.
- Let it dry or cure fully.
- Seal with a glossy or matte top coat.
The 5 Ideas at a Glance
| Idea | Difficulty | Best for | Needs a gel lamp? |
|---|---|---|---|
| 1. Classic black-and-white zebra | Beginner to intermediate | Short and medium square nails | No |
| 2. Zebra French tips | Beginner | First-timers, office-friendly | No |
| 3. Silver chrome zebra | Advanced | Gel users who like shine | Yes |
| 4. Pink Y2K zebra | Beginner to intermediate | Playful, colorful looks | No |
| 5. Negative space zebra | Intermediate | Clean, modern looks | No |
Why Zebra Print Nails Are Everywhere in 2026
Zebra has become the animal print of 2026 in fashion. The Everygirl says it gained traction in 2025 and has settled in as a neutral, and Hola reports it across fashion weeks and street style. Nail coverage has followed, with nail blogs naming zebra a standout print for the season.
It works on nails for the same reason it works on clothing. Bold black stripes on a pale base look graphic and modern, closer to a stripe than to a classic spotted animal print. If you’re wearing the print on your clothes too, see our zebra print dress looks.
What You Need
| Tool | Why you need it |
|---|---|
| Base coat | Protects the nail and helps polish last |
| Black and white polish (or gel) | The classic stripe and base colors |
| Thin striping brush or nail art pen | Draws fine, controlled lines |
| Toothpick (backup) | A budget alternative for tiny details |
| Glossy or matte top coat | Seals the design |
| Nail lamp (gel only) | Cures each layer |
| Cleanup brush and remover | Fixes edges and cuticles |
| Cuticle oil | Keeps the finish fresh |
One nail tutorial site notes that it can be easier to start with a white base instead of black, and that you should let each layer dry fully before painting on top.
Best Nail Shapes and Lengths for Zebra Print
Square nails work especially well for the classic black-and-white version, because the straight edges echo the graphic feel of the print. Almond nails give it a softer, more feminine look.
Short nails can carry zebra too. Stripes crowded onto a small nail bed look busy, so use an accent nail with the full stripe pattern and keep the other nails solid black or white.
If you’re unsure which shape suits your hands, our guide to finding your best nail shape can help.
5 Edgy Zebra Print Nails Ideas
1. Classic Black-and-White Zebra Print Nails
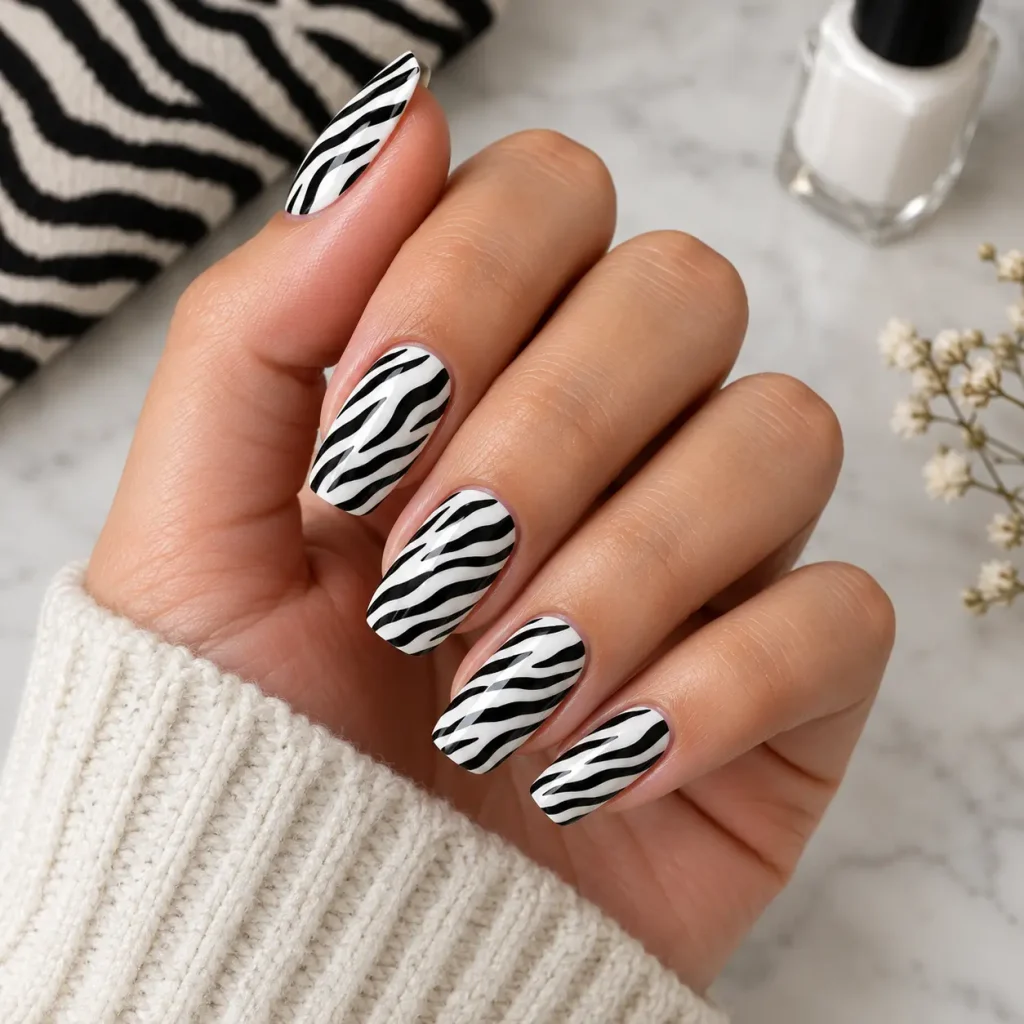
The look: a crisp white base with thin black stripes and a glossy finish.
How to do it
- Apply a base coat and two thin coats of white. Let each dry fully.
- Load a fine striping brush with black polish.
- Paint tapered, slightly curved stripes that start at the nail edge and curve inward.
- Add a few V-shaped or forked stripes, then leave white gaps between them.
- Seal with a glossy top coat.
Best for: short to medium square nails.
Tip: keep the stripes irregular. Perfectly parallel lines look like a barcode, not a zebra.
2. Zebra French Tip Nails
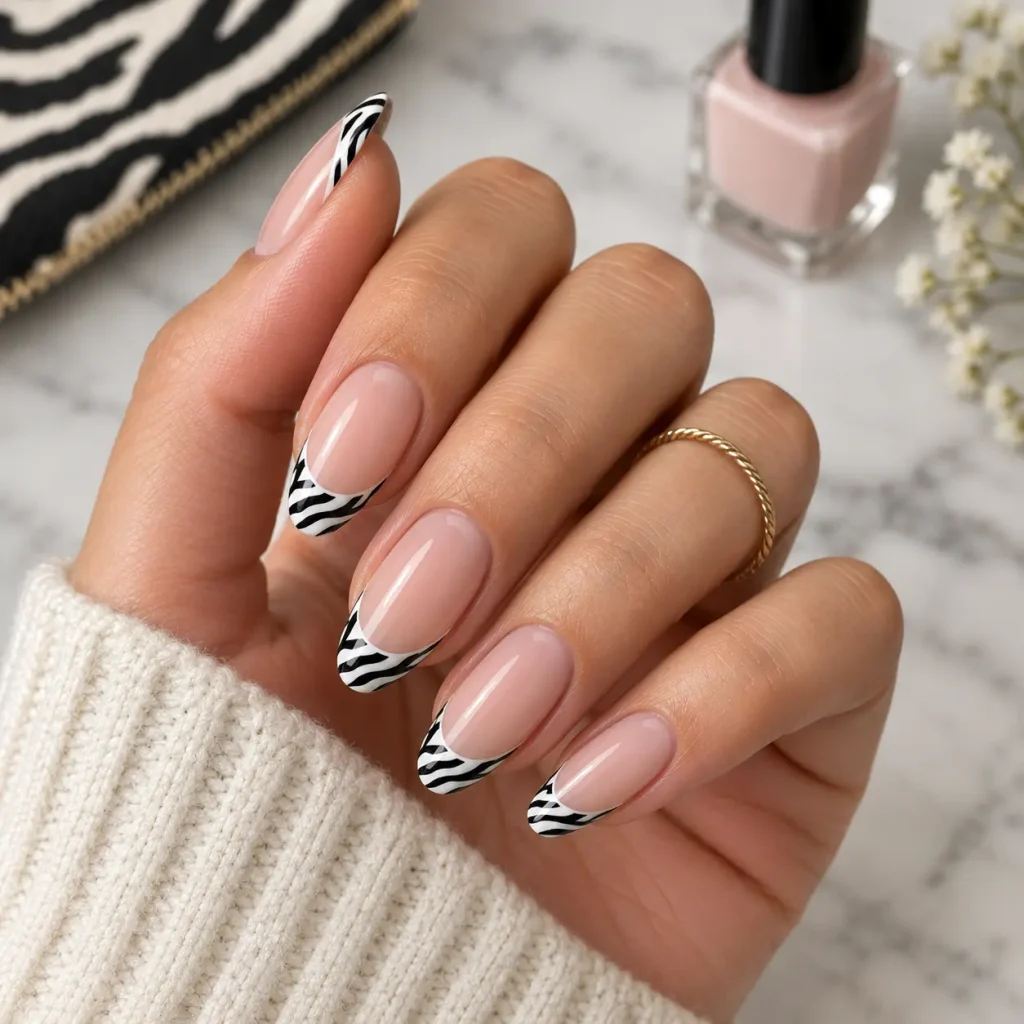
The look: a sheer nude or pink base with thin black-and-white stripes at the tips instead of a plain white edge.
This is the lowest-commitment way into the trend, and it’s easy to wear to work.
How to do it
- Apply a base coat and a sheer nude or pink polish.
- Paint a smile-line curve of white at the tip.
- Add a few fine black stripes inside the tip, pointing toward the cuticle.
- Seal with a glossy top coat.
Tip: use a French tip guide for an even smile line, then add the stripes freehand.
3. Silver Chrome Zebra Print Nails
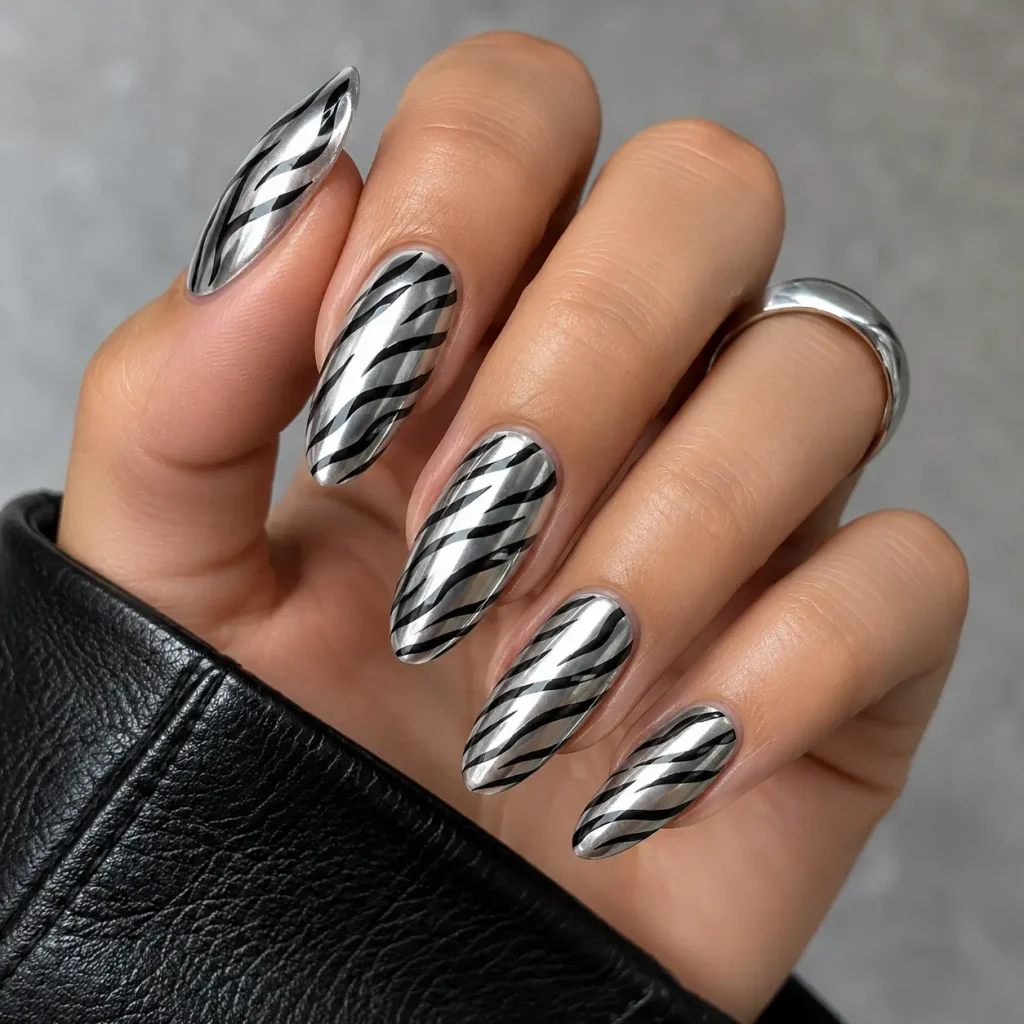
The look: a mirror-silver nail with black zebra stripes on top.
This is the most advanced idea here, and it needs gel and a lamp.
How to do it
- Apply gel base coat and a white or silver gel color. Cure.
- Apply a no-wipe gel top coat and cure it.
- Rub chrome powder over the cured layer, then brush off any extra.
- Paint black gel stripes with a fine brush and cure.
- Seal with a no-wipe top coat and cure.
Tip: keep the stripes thin so the chrome still shows. Heavy stripes hide the shine.
4. Pink Y2K Zebra Print Nails
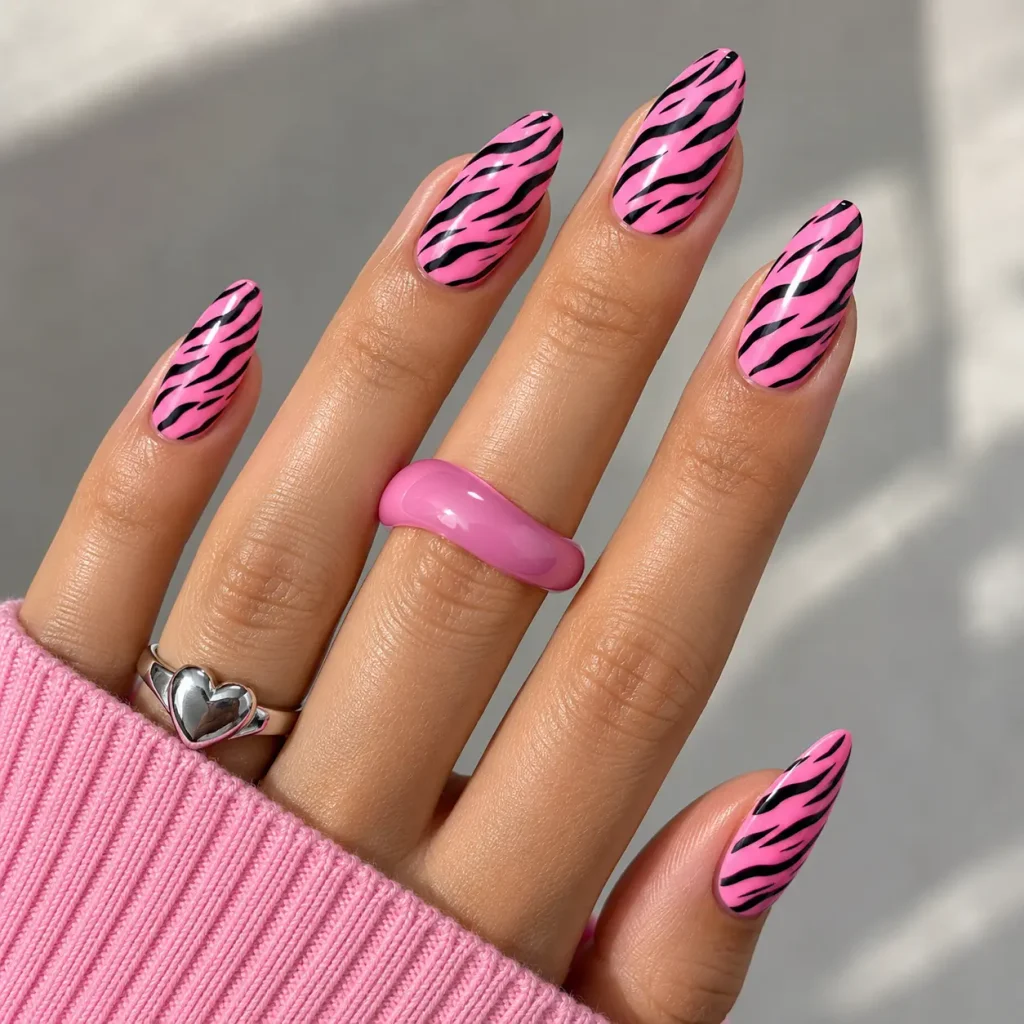
The look: a soft or hot pink base with black stripes. The color nods to Y2K style and looks great with a French tip or a squared shape.
How to do it
- Apply a base coat and two thin coats of pink.
- Paint thin black stripes with a fine brush.
- Seal with a glossy top coat.
Tip: keep the stripes black or black plus one metallic. When the base color carries the personality, the stripes can stay neutral.
5. Negative Space Zebra Print Nails
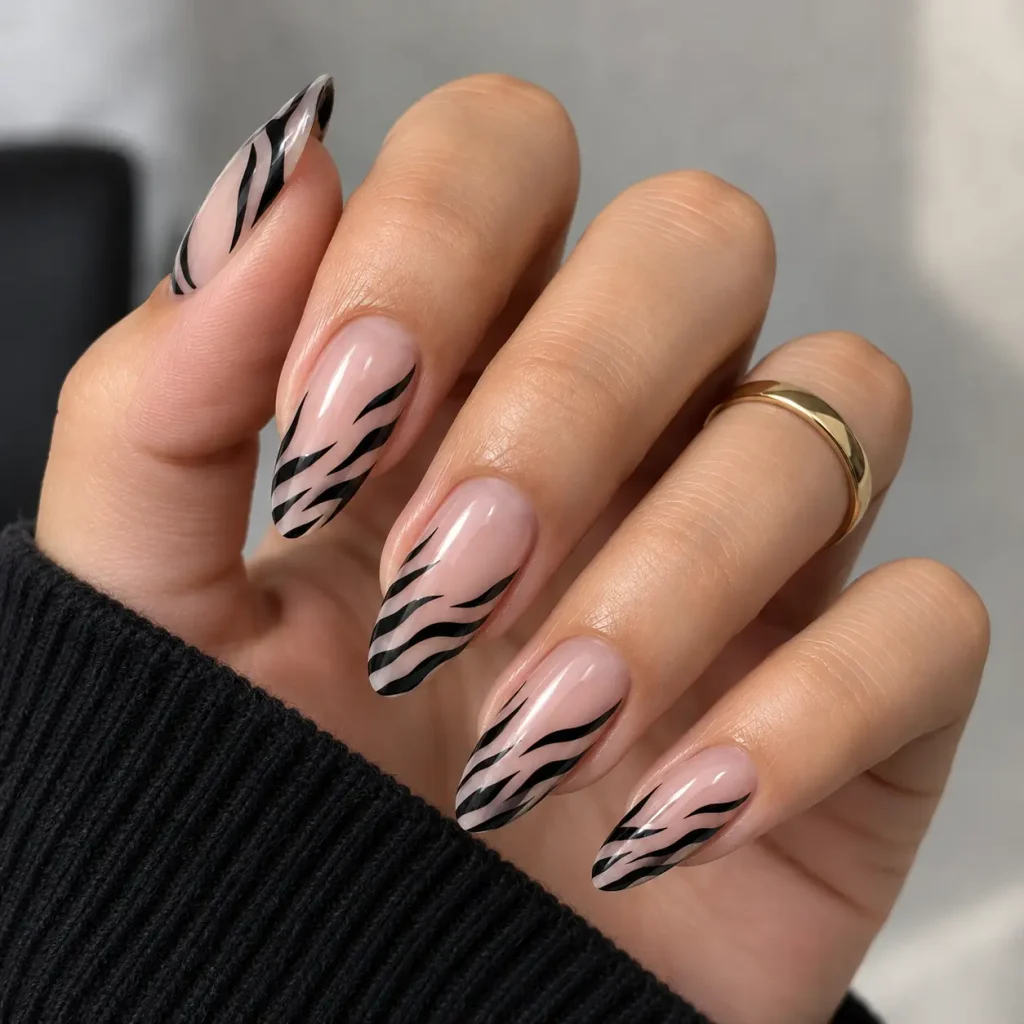
The look: stripes painted only in the center or lower half of the nail, with the natural nail or a clear polish framing them.
How to do it
- Apply a base coat and a clear or sheer polish.
- Paint black zebra stripes on only part of the nail, such as the center or the tip half.
- Keep the stripes thin and spaced out.
- Seal with a glossy top coat.
Tip: work on a clean, well-shaped nail bed. This look shows every edge.
Quick Variations
- Glitter zebra: add a glitter polish on one accent nail.
- Matte zebra: use a matte top coat for a softer finish.
- Reverse zebra: black base with white stripes.
- Zebra and leopard mix: alternate the two prints. One nail blog says mixing prints avoids the flat look of ten identical nails.
How to Draw Convincing Zebra Stripes
Stripes are the whole design, so a few rules help:
- Taper the lines. Start thicker at one end and thin out.
- Curve them slightly. Real zebra stripes bend, they don’t run straight.
- Vary length and direction. Some short, some long, a few forked.
- Leave gaps. Dense clusters look busy, especially on small nails.
- Work from the edges in. It’s easier to control the pattern.
- Wipe your brush. A little polish at a time gives crisper lines.
Don’t have a fine brush? A toothpick or a nail art pen also works for small details.
Gel vs. Regular Polish for Zebra Nails
Gel: you can fix mistakes before curing, and each layer locks in place under the lamp, which makes detailed stripes easier. It also tends to last longer.
Regular polish: it’s cheaper and faster for experimenting, but you need to let each layer dry fully before the next so the black doesn’t smear into the white.
If you’re new to nail art, start with regular polish on one accent nail. For more design ideas to try next, browse our nail design ideas.
Colors That Work With Zebra Print
- White or cream: the classic high-contrast base.
- Nude or sheer pink: a softer, everyday version.
- Hot pink: playful and Y2K.
- Pastels: a lighter, spring-friendly take.
- Silver or chrome: edgy and shiny.
- Black base with white stripes: the reverse version.
A good rule: keep the stripes black, or black plus one metallic, and let the base color change.
Common Mistakes and Easy Fixes
| Mistake | Why it happens | Fix |
|---|---|---|
| Stripes look like a barcode | Lines too even and parallel | Taper, curve and vary the lines |
| Nails look busy | Too many stripes | Leave white gaps or use an accent nail |
| Black smears into white | Layers not dry | Let each layer dry fully before painting on top |
| Lines look thick | Brush overloaded | Wipe the brush and use less polish |
| Design chips quickly | Poor prep | Prep the nails, use base and top coat, and cap the tips |
How to Make Zebra Nails Last
- Push back cuticles and remove oil from the nail before you start.
- Use a base coat and a top coat.
- Cap the free edge by running a thin line of top coat along the tip.
- Apply cuticle oil daily.
- Wear gloves for dishes and cleaning.
Frequently Asked Questions
Are zebra print nails in style in 2026?
Yes. Fashion coverage names zebra as a leading animal print of 2026, and nail blogs and trend forecasts have followed.
Can you do zebra print nails on short nails?
Yes. Use an accent nail with the full stripe pattern, or a zebra French tip, and keep the other nails solid.
What nail shape is best for zebra print?
Square nails suit the classic black-and-white version, and almond nails give a softer look. Short nails work with an accent nail.
What colors go with zebra print nails?
White, nude, pink, pastels, silver and a black base all work. Keep the stripes black, or black with one metallic.
How do I do zebra nails without a nail art brush?
Use a toothpick or a nail art pen. Both work for small, thin lines.
Is gel or regular polish better for zebra print?
Gel is easier for detailed stripes because you can cure each layer. Regular polish is fine for beginners as long as each layer dries fully.
Can I mix zebra with other nail designs?
Yes. Zebra pairs with French tips, glitter, matte finishes and even leopard print on alternating nails.
Final Thoughts
Zebra print nails come down to thin, tapered stripes, a clean base and a bit of restraint. Start with the classic or the French tip, then move to chrome or negative space once you’re comfortable.
Your next step: pick one of the five ideas, try it on a single accent nail first, and keep the stripes uneven. For more looks to try, browse our nail design ideas.
Style Blooming isn’t affiliated with any brand mentioned. If a product irritates your skin, stop using it. Trends and availability can change.